Disclosure: As an Amazon Associate and participant in other affiliate programs, we earn from qualifying purchases. We only recommend products we believe will provide value to our readers.
Cooking fish perfectly resembles a balancing act – just one extra minute can turn your expensive halibut dry and rubbery. This kitchen challenge makes sous vide halibut a real game-changer for anyone who loves to cook.
The sous vide method turns this delicate fish into a moist, flaky masterpiece that comes out perfect every time.
This piece guides you through each step to create restaurant-quality halibut at home, whether you’re just starting with fish sous vide or want to improve your technique.
You’ll find the right temperature settings, timing, and expert tips for perfectly cooked halibut.
The guide explains why this cooking method works best for fish and offers creative serving ideas to lift your dining experience.
Table of Contents
What is Sous Vide Cooking?
You seal your favorite food in a plastic bag and cook it in a warm water bath. This simple process defines sous vide cooking – a French term meaning “under vacuum.” Your kitchen transforms into a precision cooking lab that lets you control every detail of the cooking process.
Sous vide treats your food like a relaxing spa day. The process starts with placing ingredients (halibut in this case) in a sealed bag and submerging them in temperature-controlled water.
Your food cooks uniformly from edge to edge because the water stays at the exact same temperature.
Sous vide brings unique advantages to fish cooking:
- Perfect doneness every time – no more overcooked, dry fish
- Even cooking throughout the entire filet
- Locked-in moisture and natural flavors
- Hands-off cooking with minimal monitoring needed
- Consistent results, whether you’re cooking one portion or several
Traditional halibut cooking feels like a constant guessing game with temperature and timing. Sous vide eliminates this uncertainty. The water bath does all the work once you set the perfect temperature. Your home kitchen now has the precision of a professional chef’s workspace.
Simplicity makes sous vide beautiful. Your halibut cooks gently in its own juices with your chosen seasonings. Harsh temperature changes that dry out fish become a thing of the past. You can focus on side dishes or spend time with guests instead of hovering over the stove.
Think of it this way: Traditional cooking resembles filling a water balloon with a fire hose – too much force spells disaster. Sous vide feels more like a gentle stream of water filling that balloon – controlled, precise, and more likely to give you perfect results.
Sous vide creates endless possibilities for fish enthusiasts. This method works exceptionally well with delicate fish like halibut that has a thin line between perfect and overcooked. The precise temperature control guarantees that tender, flaky texture that makes halibut so special.
Read also: Greek Baked Fish Psari Plaki Recipe
Why Choose Halibut for Sous Vide?
Halibut is a perfect choice to start your sous vide adventures, especially if you want to become skilled at cooking fish at home. This prized white fish has unique qualities that make it ideal for precise cooking methods.
Halibut works great with sous vide cooking because:
- Its lean, delicate flesh needs careful temperature control
- The thick, meaty filets keep their structure well
- Natural flavors stay intact and improve
- You won’t have to worry about it drying out
- The fish’s subtle sweetness comes through perfectly
Traditional cooking methods can work against halibut’s lean nature. Even expert chefs find it tricky to get it just right. Sous vide cooking works with the fish’s natural properties instead of fighting them.
Halibut serves as a blank canvas for your cooking creativity. The mild flavor welcomes seasonings and marinades easily. The sous vide method lets these flavors blend gently without overpowering the fish’s natural taste.
The thickness of halibut filets makes it an excellent choice for sous vide. Thinner fish often cook unevenly. Halibut’s substantial cut allows better temperature control throughout cooking. You’ll get that flaky texture with moisture in every bite.
The fish’s protein structure responds well to exact temperature control. Regular cooking can quickly overcook the fish. Sous vide keeps that sweet spot where proteins set perfectly without overdoing it. You’ll consistently get that tender, succulent texture that makes halibut special.
Health-conscious cooks will love halibut’s nutritional value. Sous vide cooking keeps the fish’s natural omega-3 fatty acids intact. It also preserves other beneficial nutrients that might disappear with traditional cooking methods.
Halibut’s forgiving nature makes it perfect for sous vide cooking. Traditional methods only give you a small window for perfect doneness. Sous vide extends this window by a lot. You can prepare sides or chat with guests without worrying about split-second timing for your main dish.
Want to try something new? Check this: Trevally Recipe Secrets
Essential Equipment and Tools for Sous Vide Halibut
Getting the right equipment will help you achieve restaurant-quality results with sous vide halibut in your kitchen. Let’s look at the tools you’ll need.
Essential Equipment:
- Sous Vide Immersion Circulator – Your main tool to control water temperature
- Large Container or Pot – Deep enough to fully submerge your fish
- Vacuum Sealer and Bags – To create an airtight seal around your halibut
- Kitchen Thermometer – To verify your fish’s internal temperature
- Timer – Built into most circulators, but a separate one can help
- Heavy-Bottom Pan – To give an optional finishing sear
A few extra tools can boost your sous vide halibut experience. A rack or weights keep your fish bags submerged, and bag clips secure them to the container’s side for stable cooking.
Your immersion circulator needs reliable temperature control and good water circulation. This vital piece of equipment directly affects your results, so position it where water flows freely around your sealed halibut.
The right container makes a difference. A dedicated sous vide container with a fitted lid minimizes water evaporation during longer cooks. Make sure it’s deep enough to keep your halibut submerged with an inch of water above it.
A vacuum sealer ranks next in importance. You can use the water displacement method with zip-top bags, but a proper vacuum seal will give a more even cook and helps seasonings penetrate the fish better. Pick bags rated for sous vide cooking to prevent leaching or bag failure.
A quality kitchen thermometer acts as your quality control. Your circulator maintains consistent water temperature, but checking your halibut’s internal temperature ensures food safety and desired doneness.
A quality heavy-bottom pan works best if you want to finish your halibut with a quick sear. Cast iron or stainless steel creates that golden crust without overcooking your perfectly sous vide fish.
Read also: Air Fryer Halibut Recipe
Note that quality tools make a noticeable difference in your final results. Start with these essentials and add specialized items as you explore more sous vide techniques.
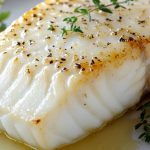
Sous Vide Halibut Recipe
- Total Time: 55 minutes
- Yield: 4 portions 1x
Description
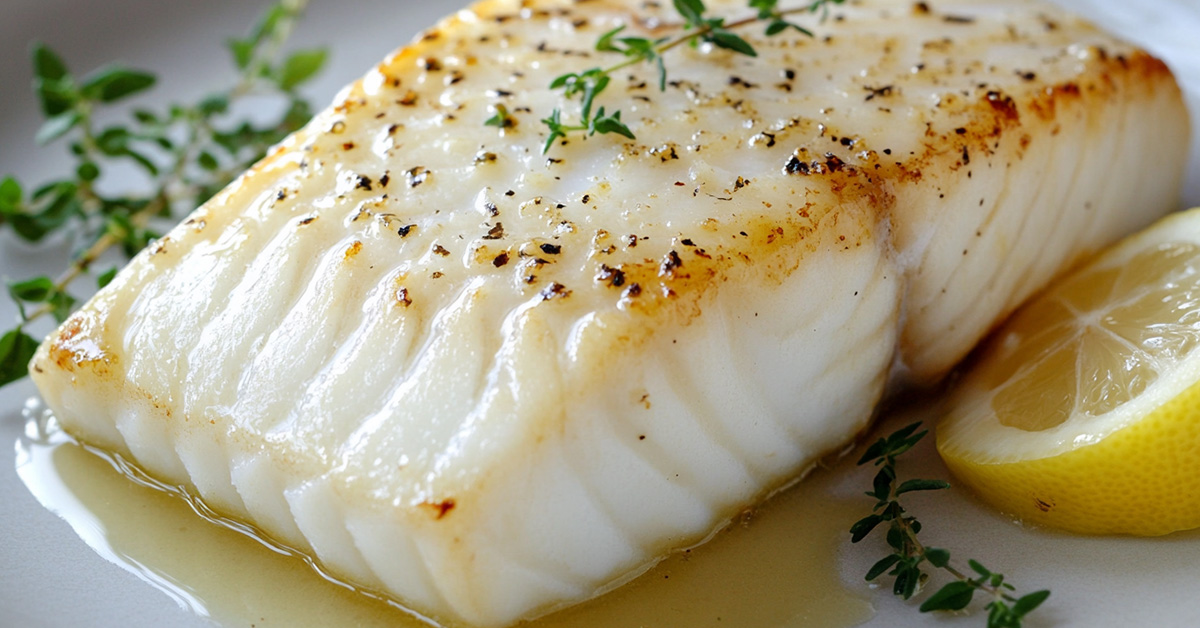
This sous vide recipe will help you create tender, flaky halibut that rivals restaurant quality. Your fish will turn out moist and perfectly cooked when you control the temperature precisely.
The recipe pairs temperature-controlled cooking with butter, herbs, and garlic to create something special. Your halibut will stay naturally moist while developing deep, rich flavors.
Ingredients
- 4 halibut filets (5–6 oz each)
- Kosher salt
- 2–3 tablespoons butter
- Fresh herbs (thyme, dill, or parsley)
- 2 cloves garlic, smashed
- Fresh lemon for serving
Instructions
- Season and Rest: Pat the halibut dry and add a generous amount of salt. The fish should rest in the refrigerator for 30 minutes to improve flavor.
- Prepare Water Bath: Your sous vide machine should be set between 104°F and 140°F (40°C-60°C). Choose the temperature based on your preferred texture.
- Bag the Fish: Add halibut to a vacuum-seal bag along with butter, herbs, and garlic. The filets need to stay in a single layer.
- Cook: Put the sealed bag into the water bath. Cook for 30-45 minutes for one-inch filets. Thicker pieces need 45-60 minutes.
- Finish: Remove fish from the bag with care and pat it dry. You can create a golden crust by searing quickly in hot butter for 30-60 seconds on each side.
Notes
- The fish texture stays best when cooked under one hour
- Use high-quality fish that’s suitable for raw consumption
- A brine bath before cooking helps create firmer texture
- Acidic ingredients in the bag can change the fish’s texture
- Prep Time: 10 minutes
- Cook Time: 45 minutes
- Category: Seafood
- Method: Sous Vide
- Cuisine: European
Ideal Temperature and Timing for Sous Vide Halibut
The secret to perfect sous vide halibut lies in getting the right temperature. This amazing cooking method creates different textures in your fish based on the temperature you choose.
Here’s what different temperatures do to your halibut:
| Temperature | Texture Result |
|---|---|
| 104°F (40°C) | Very soft, sashimi-like |
| 122°F (50°C) | Tender, moist, medium-rare |
| 130°F (54°C) | Flaky, traditional texture |
| 140°F (60°C) | Firm, well-done |
Your texture preference will determine the ideal temperature. Most home cooks find 130°F (54°C) to be the sweet spot that creates the perfect balance between flakiness and moisture – what makes halibut special.
The cooking duration is just as important as temperature. Here’s a quick guide:
- 1-inch thick filets: 30-45 minutes
- 1.5-inch thick filets: 45-60 minutes
- 2-inch thick filets: 60-75 minutes
Note that cooking beyond these recommended times won’t make your halibut more “done.” Sous vide gives you extra flexibility. Your fish won’t overcook with an additional 15-30 minutes, but longer times might affect its texture.
Check your halibut’s internal temperature about 5 minutes before the minimum cooking time. Pat the fish dry after removing it from the bag. A quick 30-second sear in a blazing hot pan will give you that golden crust without cooking the interior further.
Many cooks make the mistake of using frozen halibut. Thawed halibut cooks more evenly and has better texture. Add 15-20 minutes to your cooking time if you need to cook from frozen.
Maintaining consistent temperature is vital throughout cooking. Cover your water bath to avoid temperature changes and keep your halibut submerged. Your immersion circulator should create good water flow around the fish packets.
Your filet’s thickness plays a significant role in timing. Add 15 minutes of cooking time for each additional half-inch of thickness. This approach gives you that perfect, consistent texture from edge to edge.
Serving Suggestions for Sous Vide Halibut
A beautifully cooked sous vide halibut needs elegant presentation and thoughtful sides. You can transform your masterpiece into a complete dining experience that will delight your guests’ eyes and taste buds.
Light, complementary sauces will boost your halibut’s delicate flavor without overpowering it:
- Lemon-butter sauce with capers
- White wine cream reduction
- Fresh herb vinaigrette
- Citrus beurre blanc
- Light cucumber yogurt sauce
The temperature contrast principle makes your halibut shine. Your fish tastes best with both warm and cool sides. Here’s a simple pairing guide:
| Warm Sides | Cool Sides |
|---|---|
| Roasted asparagus | Cucumber salad |
| Sautéed wild mushrooms | Fresh fennel slaw |
| Garlic mashed potatoes | Tomato-avocado relish |
| Braised baby vegetables | Citrus segments |
The “rule of thirds” creates perfect plating balance. Place your cooked filet slightly off-center and arrange sides around it. A splash of sauce adds both flavor and artistic flair.
Texture plays a vital role in creating an engaging dish. Crispy elements like toasted pine nuts or fried capers contrast beautifully with tender halibut. Fresh microgreens or herb leaves scattered on the plate add visual appeal and subtle flavor notes.
These professional touches create restaurant-quality presentation:
- Warm your serving plates slightly
- Create height by stacking components thoughtfully
- Use negative space to make your halibut the star
- Add a final drizzle of high-quality olive oil
- Finish with flaky sea salt just before serving
Seasonal vegetables make perfect companions. Spring brings tender pea shoots and asparagus, while summer offers colorful cherry tomatoes and fresh corn succotash. Fall’s roasted root vegetables and winter’s hearty mushroom medleys complement the fish perfectly.
Sauce placement can make or break your presentation. Rather than drowning your fish, create artistic swooshes on the plate or serve sauce in a small pitcher on the side. Your guests can control their portions while admiring the halibut’s beautiful presentation.
The delicate texture of sous vide halibut needs light, bright flavors. Fresh herbs, citrus notes, and seasonal vegetables work best. This approach keeps your perfectly cooked fish as the star while creating a harmonious, well-balanced plate.
Read also: Fried Pollock Recipe
Nutritional Information for Sous Vide Halibut
The nutritional profile of sous vide halibut helps you make smarter dietary choices. This gentle cooking method preserves nutrients better than traditional cooking techniques.
A 6-ounce portion of sous vide halibut packs these nutrients:
| Nutrient | Amount per Serving |
|---|---|
| Calories | 180 |
| Protein | 35g |
| Fat | 4g |
| Omega-3 Fatty Acids | 0.8g |
| Cholesterol | 45mg |
| Sodium | 115mg |
Sous vide cooking excels at preserving these valuable nutrients. Your halibut delivers maximum nutritional benefit because:
- Natural oils and fats stay locked in the fish
- Water-soluble vitamins remain intact
- Minerals aren’t lost to cooking water
- Proteins maintain their structure
- Omega-3 fatty acids are preserved
Sous vide halibut gives you plenty of vitamin B12, vitamin D, and selenium. These nutrients help maintain healthy bones and support your immune system. The precise temperature control retains these nutrients better than high-heat methods.
Protein Power: Halibut’s high protein content makes it perfect for muscle maintenance and growth. Each serving gives you 70% of your daily protein needs – ideal for athletes and health-conscious eaters.
Halibut’s low-fat profile suits calorie-conscious diners. The sous vide method brings out amazing flavor and texture with minimal added fats. You control the butter or oil in the cooking bag, which lets you manage the dish’s fat content.
Sous vide halibut fits well into most eating plans if you track macros. Its protein-to-fat ratio supports many dietary goals, from building muscle to managing weight. The precise cooking helps with portion control and makes tracking intake easier.
The gentle sous vide process keeps halibut’s natural electrolytes like potassium and magnesium intact. These minerals are vital for muscle function and hydration. Precise temperature control ensures these beneficial compounds stay in the fish instead of escaping during high-heat cooking.
References:
– Healthline
– WebMD
Note that seasonings and extra ingredients in your sous vide bag might slightly change the nutritional content. The simple cooking method adds no extra calories or fats unless you choose to include them, so you keep full control of your dish’s nutritional profile.
The Science Behind Sous Vide Cooking Halibut
The science behind sous vide halibut shows why you get perfect results every time. Let’s look at the amazing changes happening in your water bath at the molecular level.
Protein denaturation sits at the core of sous vide cooking. This process changes your halibut’s protein structure as heat increases. These proteins work like tiny springs that uncoil and link up again with rising temperature. Your fish’s texture and moisture depend on this process.
Your halibut goes through these molecular stages:
| Temperature | Protein Change | Texture Result |
|---|---|---|
| 105°F (41°C) | Myosin begins to denature | Soft, translucent |
| 120°F (49°C) | Collagen starts softening | Tender, moist |
| 130°F (54°C) | Actin proteins denature | Flaky, traditional |
| 140°F (60°C) | Complete protein firming | Firm, well-done |
Sous vide’s precision temperature control makes it special. Traditional cooking might heat the outside of your fish to 170°F while the center don’t deal very well with reaching 130°F. This creates uneven cooking and dry fish. Your sous vide setup solves this by keeping one steady temperature throughout.
Water is a vital part of this method. It moves heat 23 times better than air, which gives your halibut even cooking from every angle. The vacuum seal keeps moisture in, so your fish stays juicy. It’s like wrapping your halibut in a protective bubble where it cooks in its own juices.
Heat transfer in sous vide follows three main principles:
- Conduction – Heat moves directly through your vacuum-sealed bag to the fish
- Convection – Water circulation ensures consistent temperature throughout
- No evaporation – Sealed environment prevents moisture loss
Your halibut’s muscles react differently in sous vide compared to regular cooking. High heat makes muscle fibers contract fast and lose moisture – just like squeezing a sponge. The gentle heat in sous vide lets these fibers soften slowly while staying moist.
The vacuum seal adds another scientific benefit. Taking out air removes insulation that could block heat transfer. This direct contact between water and fish controls temperature right down to the cells.
Brining before sous vide can improve your results through osmosis. Salt molecules move into the fish’s cells and help them hold moisture during cooking. This makes juicier fish that keeps its texture even if you cook it a bit too long.
Time and temperature in sous vide follow logarithmic patterns. Temperature decides your halibut’s final texture, while time determines how deep these changes go. That’s why a 1-inch filet needs less time than a 2-inch piece to reach the same doneness.
Your halibut’s enzymes respond to temperature stability in sous vide. These natural enzymes start breaking down proteins around 105°F and make the fish tender. They stop working at higher temperatures, so precise control gives you the texture you want.
Read also: Baked Gefilte Fish Recipe
Frequently Asked Questions (FAQs)
Here are answers to the most common questions off the top of my head about cooking halibut sous vide. These practical tips will help you become skilled at this cooking technique.
Can I cook frozen halibut sous vide? Yes, you can cook frozen halibut sous vide, but you’ll need to add 15-20 minutes to your cooking time. Your fish should be thawed first to ensure even cooking and better texture.
How do I prevent my halibut from floating in the water bath? The quickest way to keep your fish submerged is to:
- Clip the bag to the side of your container
- Use a sous vide weight
- Place a heavy spoon in the top corner of the bag before sealing
What’s the best way to season sous vide halibut? Simple seasoning works best with salt, butter, and fresh herbs. Acidic ingredients like lemon juice in the bag can affect texture. Add citrus after cooking instead.
How long can I leave halibut in the sous vide bath? The cooking window gives you flexibility, but stick to these times for the best texture:
| Thickness | Maximum Time |
|---|---|
| 1 inch | 1 hour |
| 1.5 inch | 1.5 hours |
| 2 inch | 2 hours |
Should I brine my halibut before sous vide cooking? A 30-minute brine improves texture and flavor. Mix 1 tablespoon salt per cup of water. Note that you should reduce seasoning later since the fish absorbs salt.
Why did my halibut turn mushy? Your halibut can turn mushy because of:
- Cooking too long
- Temperature too low
- Poor quality fish
- Using previously frozen fish without adjusting cooking time
Can I refrigerate and reheat sous vide halibut? Fresh halibut tastes best. If you need to reheat, use your sous vide at 120°F (49°C) for 15 minutes to avoid overcooking.
What’s the minimum safe temperature for sous vide halibut? Cook halibut to at least 130°F (54°C) for vulnerable populations. Healthy adults can safely enjoy medium-rare texture at 122°F (50°C).
How do I achieve a crispy skin? After sous vide cooking, pat the skin completely dry. Sear skin-side down in a very hot pan with oil for 30-45 seconds. A fish spatula prevents sticking.
What if my vacuum sealer isn’t working? The water displacement method with a zip-top bag works well. Submerge the bag slowly while keeping the zip-top above water level. Water pressure pushes out air naturally.
Can I add vegetables to the same bag as my halibut? Vegetables need different cooking temperatures and times. Cook them separately to prevent their water from affecting your fish’s texture.
How do I know if my halibut is done? Your halibut is ready when it’s opaque and flakes easily with a fork. Sous vide cooking gives you flexibility – a few extra minutes won’t ruin your fish like traditional methods.
Sous vide cooking gets better with practice. Try different temperatures within the safe range to discover your perfect texture.
Conclusion
Sous vide cooking makes halibut preparation simple and reliable instead of risky. You can guarantee perfect texture every time with precise temperature control. The gentle cooking method keeps natural flavors and nutrients intact.
The right equipment combined with proper timing, temperature, and technique will help you create restaurant-quality halibut dishes.
Your family and guests will be impressed by the results. The science proves this method works – proteins denature slowly, moisture remains trapped inside, and flavors develop naturally.
Once you become skilled at sous vide halibut cooking basics, overcooked fish will never be a concern.
Each perfectly cooked filet demonstrates why this method excels at preparing this prized seafood. You can start with simple recipes and test different temperatures and seasonings to find your preferred style of this foolproof technique.

