
Craving crispy fish but want a healthier option than deep-fried batter? You’re in the right place. This baked battered fish recipe gives you that same golden crunch and juicy interior – right from your oven, no frying required.
Now, let’s clear something up:
While classic battered fish is usually deep-fried with a runny flour-based batter, this oven-friendly recipe uses a rich egg-mayo mixture that acts as a flavorful, sticky batter. We then coat it with seasoned breadcrumbs to give it that irresistible crunch.
So you get the moist, “battered-style” texture plus the crispy exterior of a breaded filet – all baked, never fried.
 You might notice there’s no “Jump to Recipe” button yet – that’s because this guide goes deeper than a typical recipe card. We wanted to walk you through the full technique, step by step, so you get perfect results every time. That said, we know many of you love to print and save recipes, so don’t worry – a printable recipe card is coming soon!
In this guide, you’ll learn how to master this hybrid-style baked battered fish – from choosing the right type of fish and prepping it properly, to creating the perfect coating and nailing the bake.
The result? Restaurant-quality fish that’s light, crispy, and packed with flavor.
Table of Contents
Ingredients for Crispy Baked Fish 
To make a mouthwatering baked battered fish recipe at home (without deep frying), you’ll need just a handful of essential ingredients. We’ll break them down into three parts: the fish, the wet coating, and the crispy outer layer.
 Fish Selection
The heart of this recipe is the fish itself. For a perfectly flaky inside and crispy outside, choose a firm, mild white fish. Here are some excellent choices:
- Cod
- Haddock
- Tilapia
- Sole
- Flounder
- Grouper
- Snapper
Aim for filets that are around 7 oz (200 grams) each. Thicker filets work especially well with this method because they stay juicy while the outside crisps up beautifully.
 Wet Coating (a.k.a. “Our Flavorful Batter”)
Instead of using a traditional liquid batter, this recipe uses a creamy, egg-based mixture that binds beautifully to the fish and helps breadcrumbs adhere evenly – delivering that “battered” style texture without deep frying.
You’ll need:
- 2 large eggs
- 3 tablespoons mayonnaise
- 1 tablespoon Dijon mustard
Did you know? The mayo not only adds flavor but also locks in moisture, keeping your fish juicy even at high oven temps.
 Crispy Coating
This is where the crunch comes from! For best texture and flavor, we recommend:
- 1/2 cup all-purpose flour (for the initial dusting)
- 1/2 cup Panko or plain breadcrumbs
- 1–2 tablespoons cornmeal (optional, for extra crunch)
- 1/4 teaspoon baking powder (optional, helps with crispiness)
 Seasoning Options
Flavor is everything. You can season both your breadcrumb mix and the fish itself with any of the following:
- 1 tablespoon Old Bay or Cajun seasoning
- 1 teaspoon garlic powder
- 1 teaspoon onion powder
- 1 teaspoon paprika
- 1/2 teaspoon dried thyme or parsley
- Lemon zest (from 1 lemon)
- Salt and black pepper to taste
Pro Tip: For a homemade fish seasoning blend, try mixing salt, pepper, paprika, garlic powder, dried dill, and a pinch of ground ginger.
By keeping the ingredients simple and focused, this baked battered fish recipe delivers crispy, golden goodness – straight from the oven, no deep fryer needed. (We’ll walk you through the process in the next sections.)
Preparing the Fish
Before diving into the coating process, it’s crucial to prepare your fish properly. This step ensures that your filets turn out flaky and juicy on the inside while holding onto that perfect crispy exterior.
 Cleaning and Cutting
Start by giving your fish a good rinse and checking for any stray bones. If you’re working with whole fish, remove the scales, guts, and fins. But for this recipe, we recommend using clean, boneless filets – ready to season and coat.
If your filets are large, feel free to cut them into more manageable portions. Scoring them lightly with 2–3 diagonal cuts on each side (depending on thickness) can help them cook more evenly and let flavor seep in.
 Patting Dry
This step is a game-changer for crispy results: pat your fish dry thoroughly with paper towels. Any excess moisture will prevent the coating from sticking and can cause sogginess in the oven.
 Fast fact: Letting the fish rest on a wire rack in the fridge for 30–60 minutes before baking helps even more by drying out the surface – perfect for that golden crust.
Seasoning the Fish
Seasoning the fish itself is just as important as seasoning the coating. Start with a generous sprinkle of salt and black pepper on both sides. Then, if you want extra flavor, try adding:
- Garlic powder
- Old Bay or Cajun seasoning
- Lemon-pepper seasoning
Apply salt right after drying the fish – this helps draw out surface moisture and amplifies the taste.
 Pro tip: Season the first side as you place it on the baking sheet or prep station. Then season the other side right before dipping into the coating mixture.
With your fish cleaned, dried, and perfectly seasoned, you’re now ready for the coating step – where the magic (and the crunch) really begins.
Making the Wet Coating
This step replaces the traditional deep-fry-style batter with a flavor-packed wet coating that clings beautifully to the fish and helps the breadcrumbs stick. It’s the secret to getting that juicy, “battered-like” texture with an oven-baked crisp.
 Why This Wet Coating Works
Instead of mixing flour and beer or soda into a classic runny batter, we use a combo of eggs, mayonnaise, and Dijon mustard. This mixture does three things at once:
- Acts like a binder for the breadcrumbs
- Seals in moisture
- Adds rich, savory flavor
“Why fry when you can bake with flavor?” – Probably some genius home cook who hated cleanup.
 Ingredients for the Wet Coating
In a medium mixing bowl, combine:
- 2 large eggs, beaten
- 3 tablespoons mayonnaise
- 1 tablespoon Dijon mustard
- Optional: 1 teaspoon lemon juice or a few drops of hot sauce for extra zing
Whisk everything together until it’s smooth and creamy. The texture should be loose enough to coat the fish evenly, but thick enough to cling without dripping off.
 Quick Rest Time (Optional but Helpful)
If you have a few extra minutes, let the mixture sit for 5–10 minutes before using. This helps the emulsion fully come together, creating an even smoother coating consistency.
Pro Tip
If you want to infuse even more flavor, try adding a pinch of garlic powder, smoked paprika, or lemon zest directly into the wet coating. It gives the base layer a little kick that shines through under the crispy crust.
Now that your wet coating is ready, it’s time to bring it all together with the breadcrumb layer in the next step
Coating the Fish 
Here’s where your fish transforms from simple filets to crispy, golden perfection. This process is all about layering texture – starting with a light dusting of flour, followed by our flavorful wet coating, and finally a generous crust of seasoned breadcrumbs.
Step-by-Step Coating Process
To keep things clean and efficient, we’ll use a 3-step dredging station:
- Flour Station – Lightly coats the fish and helps the wet mixture stick
- Wet Coating – Our creamy egg-mayo mix adds flavor and acts like a “batter”
- Breadcrumb Mix – Brings the crunch
Fast Fact: The classic “wet hand, dry hand” technique saves you from breading your fingers. Use one hand for the dry stations (flour & breadcrumbs), and the other for the wet station.
Set Up Your Dredging Station
Line up 3 shallow dishes or bowls:
- Dish 1: Flour Layer
- 1/2 cup all-purpose flour
- Optional: pinch of salt, pepper, or garlic powder
- Dish 2: Wet Coating
- Your prepared egg-mayo-Dijon mixture from the last section
- Dish 3: Crunchy Coating
- 1/2 cup panko or plain breadcrumbs
- Optional:
- 1–2 tablespoons cornmeal (for extra crunch)
- 1/4 cup grated Parmesan (for umami)
- 1–2 tablespoons chopped parsley or fresh basil
Coating the Filets
Now it’s time to coat your fish:
- Pat the fish dry again with a paper towel, if needed. Moisture is the enemy of crispiness.
- Dip each filet in the flour, and shake off any excess.
- Coat in the wet mixture, making sure the fish is fully covered.
- Press into the breadcrumb mix, covering every surface. Gently press to help the coating stick.
 Pro Tip: Don’t skip the press. Lightly pressing the crumbs in helps create a more even, golden crust.
 Chill Time (Optional)
Place the coated filets on a wire rack or parchment-lined tray and let them rest in the fridge for 15–30 minutes. This helps the coating set and reduces the risk of it falling off during baking.
With your fish beautifully coated, you’re just one step away from crispy oven bliss.
Baking Method 
Now that your fish is perfectly coated, it’s time to bake it to golden, crispy perfection. This step locks in the moisture, crisps up the exterior, and gives you that satisfying crunch – all without a drop of deep-frying oil.
 Preheating the Oven
Preheat your oven to 425°F (220°C). High heat is key to achieving a crispy crust and properly cooking the fish without drying it out.
 Pro Tip: Place a dark-colored sheet pan or oven-safe wire rack inside the oven while it preheats. This creates a hot surface that helps crisp up the bottom of your fish from the moment it touches the tray.
Line your baking sheet with parchment paper or lightly grease it with oil or cooking spray if you’re not using a rack.
Baking Time & Technique
Place your coated filets on the prepared hot sheet or rack, leaving space between each piece to allow air circulation. Lightly spray the tops with cooking spray or brush with a bit of oil for extra browning.
Bake for 15–20 minutes, depending on the thickness of your fish:
- 1-inch thick filet → 15–18 minutes
- ½-inch filet → around 10 minutes
Keep an eye out for these signs of doneness:
- Coating is golden brown and crisp
- Fish flakes easily with a fork
- Internal temp reaches 135°F (57°C)
 To Flip or Not to Flip?
If you’re baking directly on parchment or foil, consider flipping the fish halfway through (around the 10-minute mark) for even browning.
If you’re using a wire rack, no flipping is needed – hot air circulates underneath, giving you a crisp bottom automatically.
Did you know? Flipping too soon or too roughly is a common reason coatings fall off – if you flip, do it gently with a fish spatula or two forks.
 Rest Before Serving
Once baked, let the fish rest on the pan or rack for 3–4 minutes before serving. This helps the juices redistribute and gives the crust a final bit of crisping.
Congrats! You just baked a perfectly crispy, juicy, breaded fish that delivers all the texture and flavor of a fried battered filet – without the oil, mess, or guilt.
Serving Suggestions 
Now that your golden, crispy baked fish is ready, it’s time to complete the plate. A well-chosen side and sauce will not only elevate the presentation – it’ll balance flavors and textures beautifully.
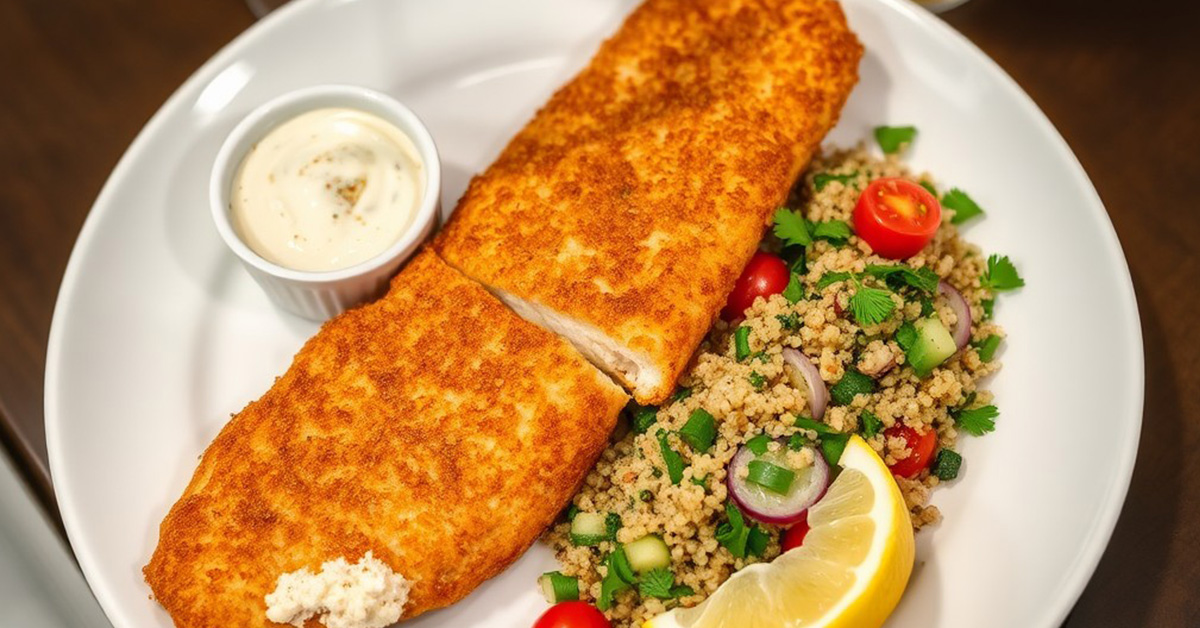
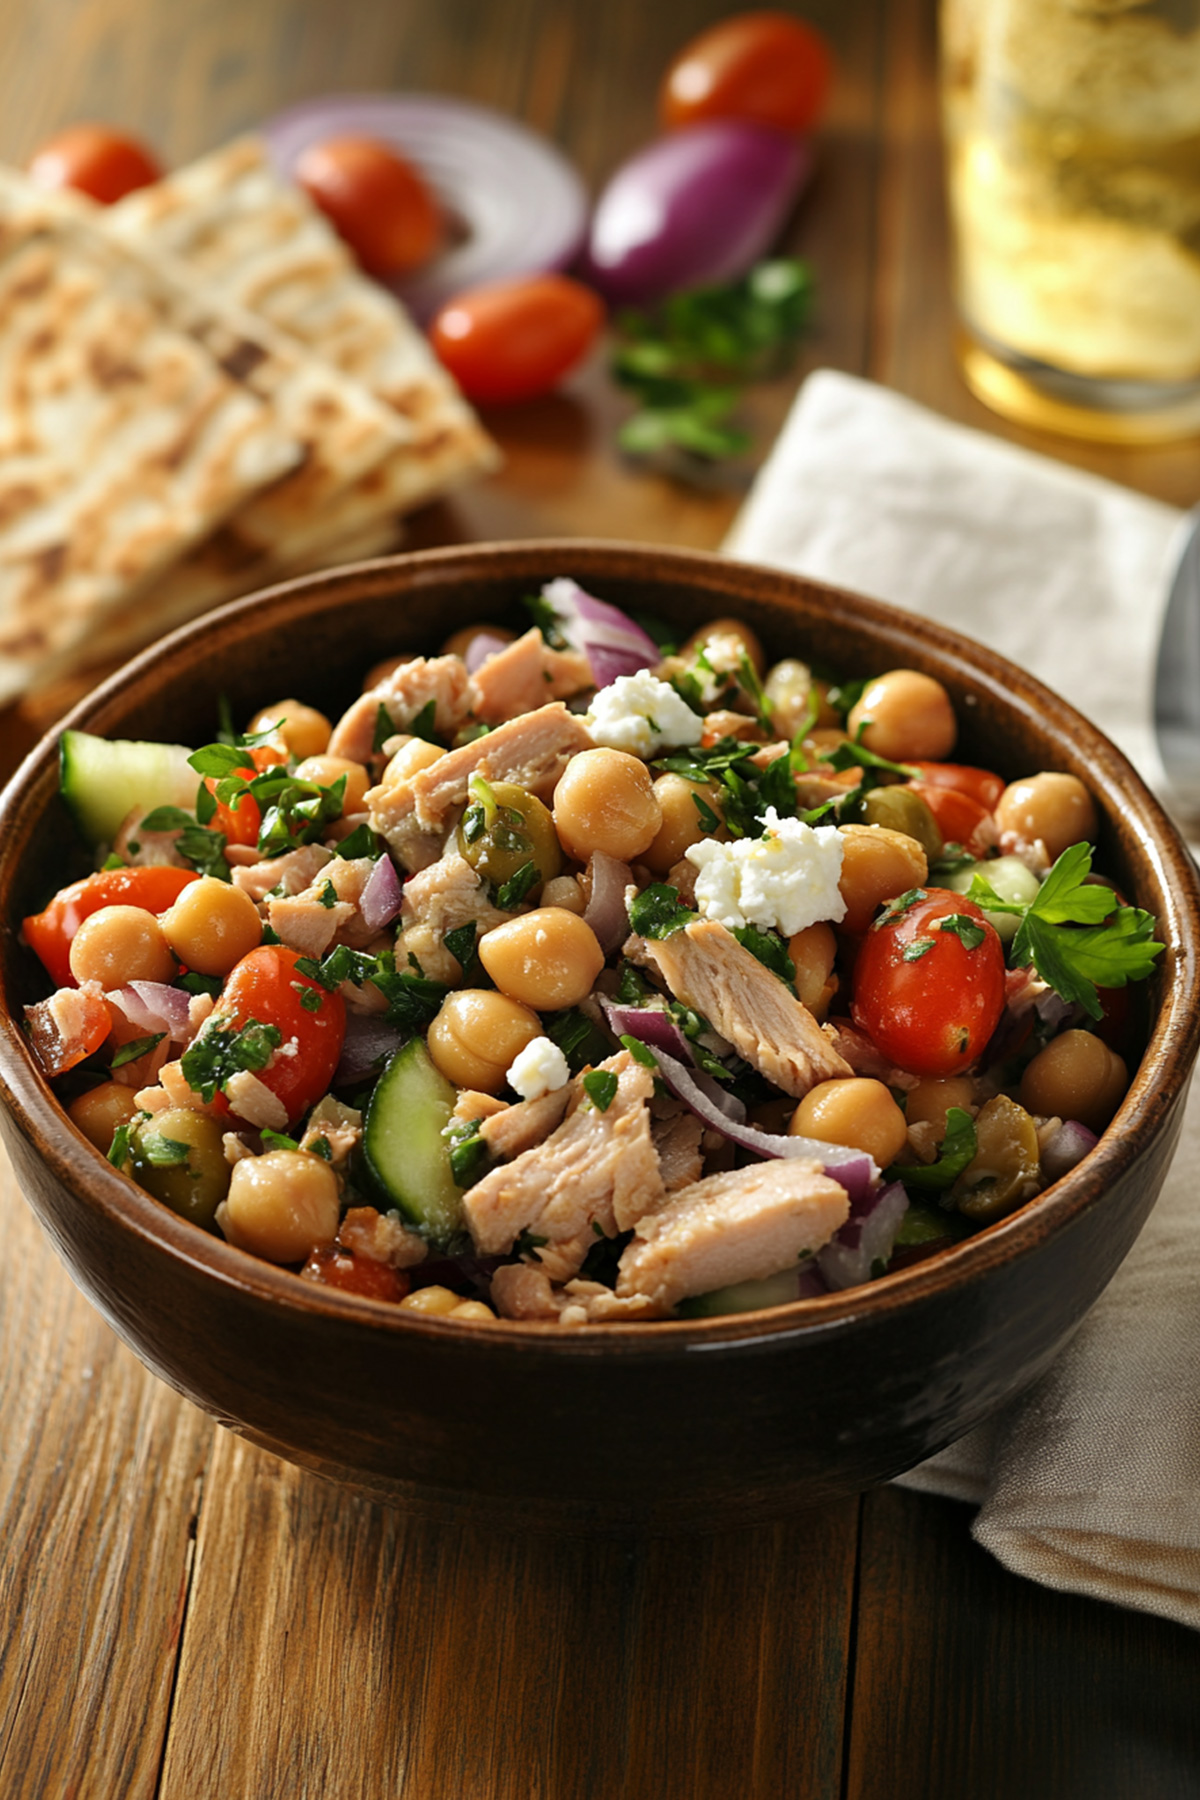
 Couscous Salad with Fresh Veggies
In the photo above, we’ve paired the fish with a Mediterranean-inspired couscous salad – a light, refreshing contrast to the crunchy coating of the fish.
Here’s what to include in yours:
- Cooked couscous (cooled and fluffed)
- Cherry tomatoes, halved
- Thinly sliced red onions
- Diced cucumber
- Chopped parsley or fresh cilantro
- Optional: green onions, lemon zest, or a pinch of cumin
Drizzle it with olive oil and a squeeze of lemon juice, then season with salt and pepper.
Did you know? Couscous is technically a pasta – not a grain – and it only takes 5 minutes to cook. Fast food for foodies!
Lemon Wedges
A must-have with any fish dish. Serve each plate with a fresh lemon wedge so your guests can brighten up the fish with a quick squeeze just before digging in.
Pro Tip: Zest the lemon before slicing it and add the zest to the couscous or breadcrumb mix for bonus citrusy goodness.
Creamy Dipping Sauce
What’s crispy fish without something to dip it in? A creamy white sauce rounds out the dish perfectly. Here are a few options that match the photo:
- Classic tartar sauce: Mayo, chopped pickles, capers, lemon juice, fresh dill
- Garlic herb mayo: Mayo, minced garlic, lemon juice, parsley or dill
- Spicy remoulade: Mayo, mustard, paprika, horseradish, hot sauce
You can make your own in under 5 minutes – or grab a good-quality store-bought version.
Optional Garnishes
- Sprinkle the fish with chopped parsley or chives for a fresh finish
- A dusting of smoked paprika adds subtle depth and color
- Want some crunch? Toasted almond slices or crispy chickpeas on the couscous work beautifully
This combination of crispy baked fish, vibrant couscous salad, and tangy dipping sauce brings color, flavor, and texture to every bite. It’s not just dinner – it’s a plated experience.
Conclusion 
Mastering the art of crispy baked fish at home doesn’t have to involve deep fryers or complicated batters. With this oven-baked battered fish recipe – which cleverly uses a rich, flavorful wet coating plus a crunchy breadcrumb crust – you get all the texture and taste of classic battered fish, minus the mess and excess oil.
This hybrid method delivers the best of both worlds:
- A juicy, well-seasoned interior
- A golden, satisfyingly crispy exterior
- And a cooking process that’s simple, oven-friendly, and lighter on calories
Whether you’re making this for a weeknight dinner or a casual gathering, it’s a dish that feels elevated while being totally achievable – even for beginners.
So next time that craving for crispy fish hits, skip the fryer and go baked. Your kitchen will stay clean, your heart will stay happy, and your plate? Well, it’ll probably be empty in minutes.
You may like also: Baked Lemon Pepper Fish Recipe
FAQs 
Is this technically a battered fish recipe?
Great question! While traditional battered fish involves dipping filets into a runny flour-based batter and deep-frying them, this oven-baked version uses a thick, flavorful egg-mayo mixture that mimics a batter. It’s then coated in seasoned breadcrumbs and baked until crispy.
So, while it’s not a classic liquid batter, it delivers that same juicy texture and golden coating – just without the oil and frying mess.
What kind of fish works best for this recipe?
Stick with firm white fish like cod, haddock, tilapia, grouper, flounder, or snapper. These types hold their shape well and offer a mild flavor that pairs beautifully with the crispy coating.
How do I make sure the coating sticks?
Pat the fish dry thoroughly before starting, and make sure you follow the order:
Flour → Wet Coating → Breadcrumbs.
This sequence helps everything bind properly and prevents the coating from sliding off during baking.
How do I keep the fish crispy in the oven?
- Preheat your oven to 425°F (220°C)
- Use a wire rack or preheated baking sheet
- Lightly spray or brush the tops of the fish with oil
- Avoid overcrowding the pan
These steps ensure the fish bakes evenly and crisps up on all sides.
Can I make this ahead of time?
Yes! You can coat the fish and refrigerate it (unbaked) for up to 4 hours. When you’re ready, just pop it in the preheated oven. You can also freeze the coated filets and bake them straight from frozen – just add 5–7 minutes to the baking time.
Can I season the breadcrumbs too?
Absolutely! Adding paprika, garlic powder, lemon zest, or even grated Parmesan to the breadcrumbs gives your fish an extra boost of flavor. Just don’t overdo it – let the fish shine through.
What sides go best with this dish?
While fries and coleslaw are classics, we recommend serving this baked battered fish with a fresh couscous salad (like the one in our photo), a creamy dipping sauce, and a wedge of lemon for brightness. It’s lighter, fresher, and still deeply satisfying.
References:
[2] – Savorynothings
[3] – Fromvalerieskitchen

I normally drop down to the recipe. In your case, you have it all broken out and with great hints and explanations. Thank you
happy you liked it
You describe baking “battered” fish but then mentioned a breading station of three trays (flour, eggs and bread crumbs). Which one did you do? The picture looks battered.
Hello Kathy, thank you for catching that. Great observation! I see the confusion now.
You’re right that the method we described in the article leans more toward breaded than traditionally battered fish. The confusion came from us calling it “battered” in the title while actually using a wet coating (egg + mayo) followed by a breadcrumb crust—what we now describe as a hybrid method.
It’s a trick we use for oven-baking: the wet coating helps keep the fish juicy like a batter would, and the breadcrumbs give you that extra crispy texture—without deep frying.
We’ve just updated the article to clarify this and align it with the actual method. Thank you again for your sharp eye. it helped us make the article better for everyone. I hope the updated version clears things up now.