Disclosure: As an Amazon Associate and participant in other affiliate programs, we earn from qualifying purchases. We only recommend products we believe will provide value to our readers.
Although oysters were once considered a poor man’s food, they’ve transformed into a sought-after delicacy, and this fried oysters recipe will help you master this classic dish at home. In fact, you can create restaurant-quality fried oysters in just 20 minutes total cooking time, with only 10 minutes of active preparation.
With this in mind, the key to perfectly crispy fried oysters lies in a few crucial techniques: maintaining the right oil temperature between 325°F and 350°F, using a proper cornmeal-flour mixture for breading, and frying in small batches of 6-8 oysters at a time.
Whether you’re aiming for the traditional Southern style or exploring the Cantonese version with its distinctive white pepper and fish sauce seasoning, this guide will walk you through creating consistently crispy, never soggy, fried oysters every time.
Table of Contents
Why Many Fail at Making Crispy Fried Oysters
Making perfectly crispy fried oysters often proves challenging for home cooks. Primarily, temperature control poses the biggest hurdle – many cooks fail to maintain consistent oil heat, resulting in either burnt or greasy oysters. When oil temperature drops below 325°F, oysters absorb excess oil, becoming soggy.
Consequently, using a reliable thermometer becomes crucial for monitoring and adjusting heat levels throughout the cooking process.
Furthermore, improper moisture management ruins the texture of fried oysters. Skipping the crucial step of thoroughly patting oysters dry before breading leads to steam formation during frying.
This steam creates gaps between the breading and oyster meat, causing the coating to slide off. Specifically, excess liquid prevents the breading from adhering properly, resulting in bare spots and uneven crispiness.
Breading mistakes also contribute to disappointing results. Many cooks rush through the breading process or use incorrect proportions in their coating mixture. The breading needs time to properly adhere – rushing through this step leads to coating that falls off during frying.
Notably, using too much flour makes the coating heavy and dense, while excess cornmeal creates an overly gritty texture.
Poor batch management significantly impacts the final product. Overcrowding the fryer causes the oil temperature to drop dramatically.
This temperature drop means your oysters steam instead of fry, producing a soggy rather than crispy exterior. Additionally, overcrowding prevents proper oil circulation around each oyster, resulting in uneven cooking.
Oil quality plays a vital role in achieving the perfect crunch. Using old or previously used oil introduces off-flavors and burns at lower temperatures.
Similarly, choosing oils with low smoke points leads to burnt exteriors before the oysters cook through. The right oil, properly maintained at the correct temperature, ensures even cooking and that signature golden-brown exterior.
Timing issues often plague novice cooks. Removing oysters too early leaves them undercooked, while leaving them too long results in tough, rubbery meat. The key lies in watching for visual cues – properly fried oysters should float to the surface and display an even, golden-brown color.
Read also: Steamed Oysters Recipe
Essential Tips for Perfect Fried Oysters
Success with your fried oysters recipe starts with proper preparation. Primarily, selecting fresh oysters makes a substantial difference – look for tightly closed shells or shucked oysters that smell like the ocean.
A proper breading station setup proves essential for achieving that perfect golden crust. Create three separate shallow dishes: one for seasoned flour, another for beaten eggs mixed with milk, and a third for your final coating mixture.
Your breading should stick firmly to each oyster, creating a protective shell that seals in moisture while developing a crispy exterior.
For optimal results, follow these crucial steps:
- Keep oysters cold until ready to fry
- Pat each oyster completely dry with paper towels
- Season both the flour and final coating generously
- Let breaded oysters rest for 5-10 minutes before frying
- Use a spider or slotted spoon for handling
Temperature precision remains paramount throughout the cooking process. A candy or deep-fry thermometer helps monitor oil temperature accurately.
Moreover, placing your breaded oysters on a wire rack after frying, rather than paper towels, maintains crispiness by preventing steam from softening the coating.
Seasoning plays a vital role in elevating your fried oysters. Beyond basic salt and pepper, consider adding paprika, garlic powder, or cayenne to your coating mixture.
Subsequently, season the oysters immediately after removing them from the oil while still hot – this ensures the seasonings adhere properly.
Proper oil management extends beyond temperature control. Strain your cooking oil between batches to remove any loose breading particles.
These particles can burn and impart bitter flavors to later batches. Therefore, keep a fine-mesh strainer nearby during your frying session.
Timing each batch precisely ensures consistent results. Watch for visual cues – your fried oysters should achieve a golden-brown color within 2-3 minutes.
Overcooking leads to tough, rubbery meat, so remove them promptly once they reach the desired color.
You may also like: Smoked Oyster Recipe
Remember that practice leads to perfection. Each batch teaches you something about temperature control, timing, and handling. Soon enough, you’ll develop an instinct for when to flip, when to remove, and how to achieve that ideal crispy exterior while maintaining tender, juicy meat inside.
The Best Oil Options for Deep Fried Oysters
Selecting the right oil stands as a cornerstone for your fried oysters recipe. Primarily, oils with high smoke points prove essential for achieving that perfect golden crust without any burnt taste.
Peanut oil ranks as a top choice, offering a neutral flavor profile and maintaining stability at temperatures up to 450°F.
Canola oil presents another excellent option, particularly for those with nut allergies. This versatile oil maintains its integrity at high temperatures while keeping your deep fried oysters light and crispy.
Accordingly, its neutral taste ensures your oysters’ natural briny flavor remains the star of the show.
Vegetable oil blends work well for home cooks seeking a budget-friendly alternative. These blends typically contain a mix of soybean and corn oils, offering good temperature stability without overwhelming the delicate oyster taste.
Nevertheless, ensure you’re using fresh oil, as repeated use can affect both flavor and performance.
Grapeseed oil deserves consideration for its clean taste and high smoke point. This oil excels at creating that sought-after crispy exterior while essentially disappearing into the background, flavor-wise.
Its light consistency helps prevent your breaded oysters from becoming greasy.
Here are the recommended oils ranked by performance:
- Peanut oil – Best overall choice
- Grapeseed oil – Premium option
- Canola oil – Reliable all-purpose pick
- Vegetable oil blend – Budget-friendly alternative
Beyond selection, proper oil management plays a crucial role. Filter your oil between batches to remove any loose breading particles.
Store used oil in an airtight container away from light and heat if you plan to reuse it. Discard the oil once it becomes dark or develops an off smell.
Read also: Grilled Oysters Recipe
Remember to heat your chosen oil gradually to prevent smoking. A properly heated oil should shimmer slightly but not smoke. When adding oysters, the oil should bubble steadily around them without violent splattering. This gentle bubbling indicates ideal frying conditions, creating that perfect balance between crispy coating and tender meat.
Fried Oysters Recipe
- Total Time: 30 minutes
- Yield: 12 Oysters 1x
Description
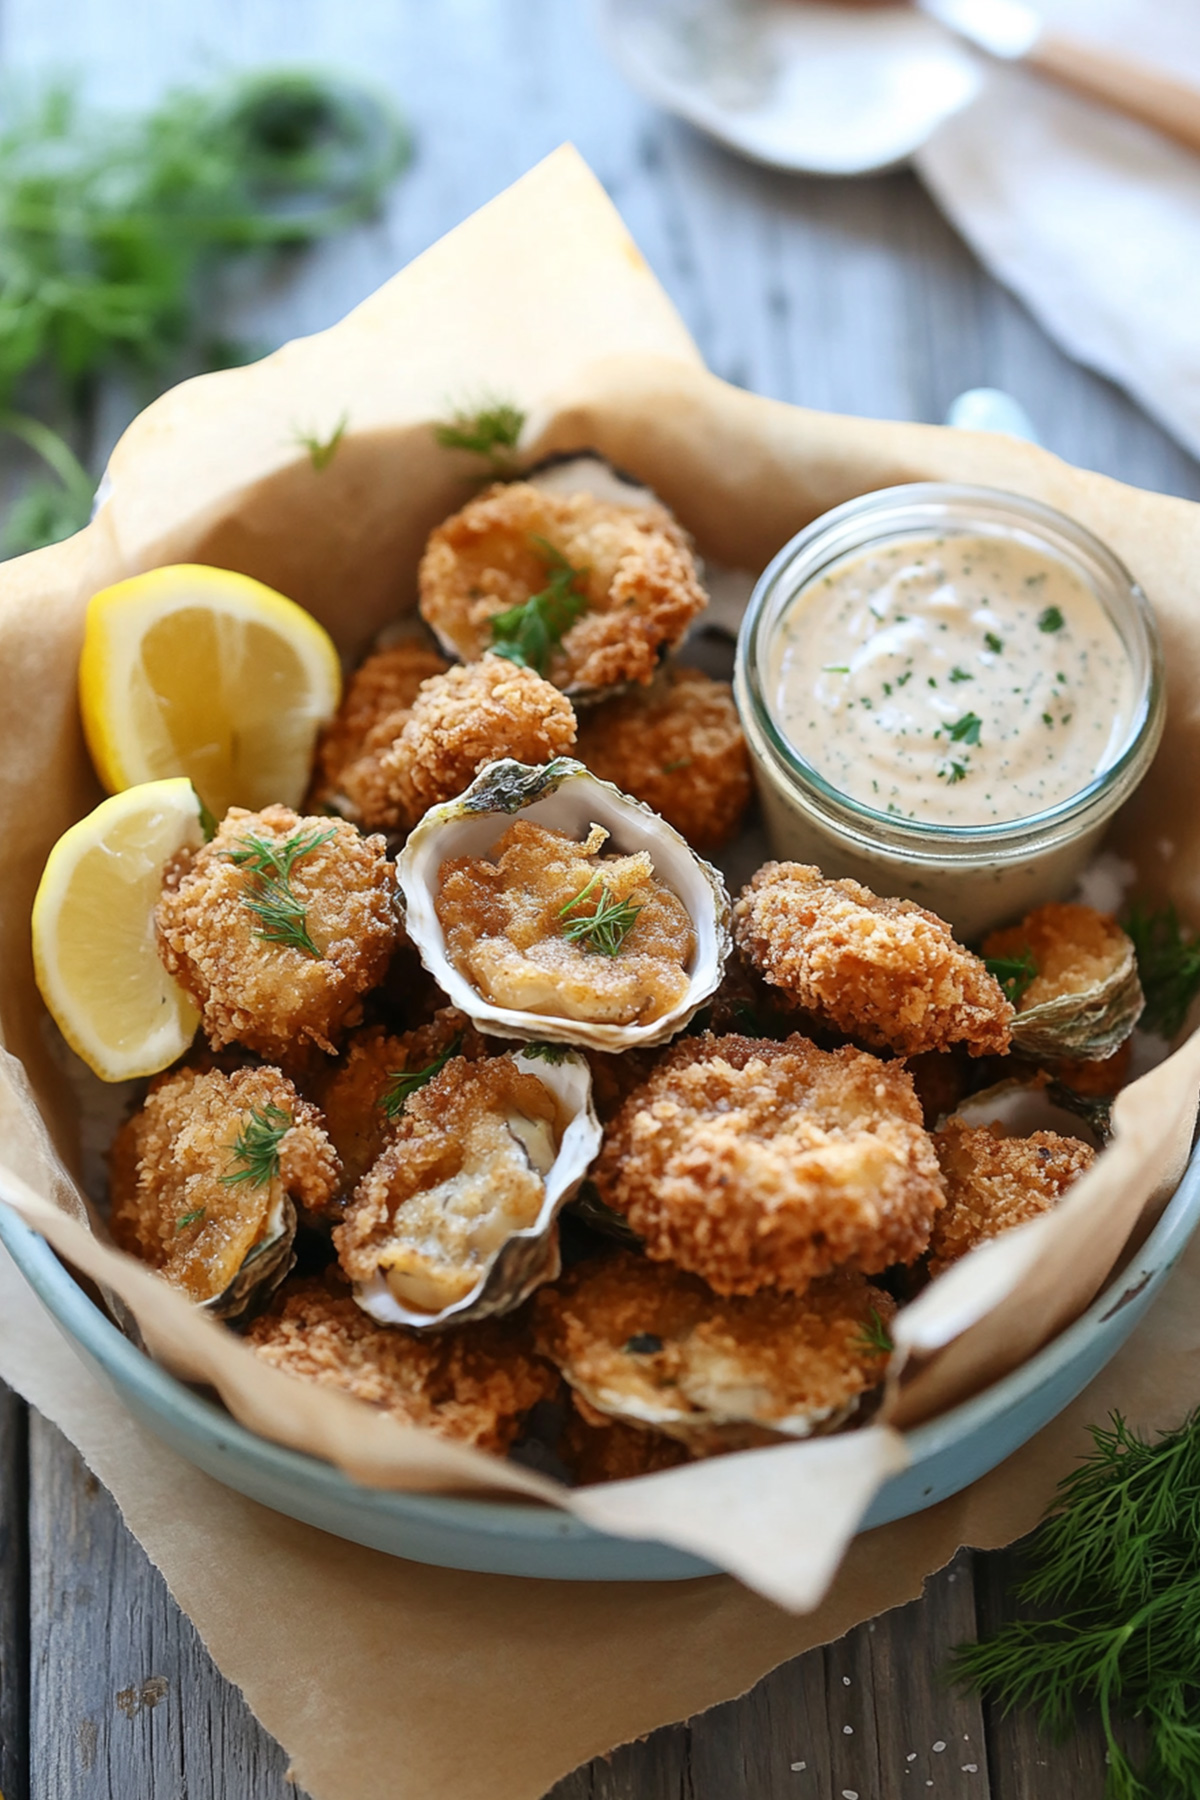
Crispy, golden-brown fried oysters await with this straightforward recipe that brings restaurant-quality results to your kitchen. This classic preparation method combines traditional Southern breading techniques with precise timing to create perfectly cooked oysters every time.
This recipe delivers tender, juicy oysters encased in a crispy cornmeal-flour coating. The buttermilk soak ensures moisture retention, simultaneously tenderizing the oysters and helping the breading adhere properly.
Ingredients
- 12 large shucked oysters, drained
- 1/4 cup all-purpose flour
- 1/2 cup yellow cornmeal
- 2 large eggs
- 2 cups vegetable or peanut oil
- 2 teaspoons seasoned salt
- 1 teaspoon black pepper
- Lemon wedges and sauce for serving
Instructions
- Drain oysters thoroughly and pat dry with paper towels.
- Prepare three separate bowls:
- First bowl: Mix flour with 1 teaspoon seasoned salt and 1/2 teaspoon black pepper
- Second bowl: Whisk eggs until well combined
- Third bowl: Combine cornmeal with remaining seasoning
- Heat oil in a heavy-bottomed pot or deep fryer to 350°F.
- Bread each oyster:
- Coat in seasoned flour
- Dip in beaten egg
- Roll in cornmeal mixture
- Place on a plate in single layer
- Fry oysters in batches for 2-3 minutes until golden brown.
- Remove with a slotted spoon and drain on paper towels.


Notes
- Maintain oil temperature between 325°F and 350°F for optimal results
- Avoid overcrowding – fry in small batches of 6-8 oysters
- Season immediately after removing from oil
- Serve promptly for best texture
- Leftover oysters can be refrigerated for up to 2 days
- Prep Time: 20 minutes
- Cook Time: 10 minutes
- Category: Seafood
- Method: Frying
- Cuisine: American
Best Side Dishes for Fried Oysters
Pairing the right side dishes with your fried oysters recipe enhances both presentation and taste. Fresh, acidic accompaniments cut through the richness of deep fried oysters, creating a balanced meal that delights your palate.
Classic coleslaw stands out as an ideal companion, its crisp texture and tangy dressing providing a refreshing contrast to the warm, crispy oysters.
Besides traditional mayonnaise-based versions, consider Asian-inspired slaws featuring rice vinegar and sesame oil for an unexpected twist.
Grilled corn on the cob, brushed with butter and sprinkled with Old Bay seasoning, complements the coastal flavors of your fried oysters.
Coupled with this, roasted asparagus or green beans tossed in garlic butter offer a lighter alternative that balances the meal’s richness.
Starch-based sides round out your plate perfectly:
- Hush puppies or cornbread – echoing the cornmeal coating
- Crispy french fries seasoned with sea salt
- Creamy potato salad with fresh herbs
- Southern-style rice and beans
- Garlic mashed potatoes
Sauce selection plays a vital role in elevating your fried oysters. Primarily, remoulade sauce, with its blend of mayonnaise, mustard, and cajun spices, creates a classic pairing.
Alternatively, tartar sauce offers familiar comfort, whereas spicy cocktail sauce adds a zesty kick that cuts through the richness.
Fresh garnishes brighten both the plate and palate. Lemon wedges remain essential, their bright acidity awakening the oysters’ natural brininess.
Likewise, fresh parsley, dill, or chives add color and subtle flavor notes that complete the presentation.
For casual gatherings, serving your fried oysters alongside pickled vegetables creates an appealing contrast of textures and flavors.
Quick-pickled cucumber slices or pickled red onions offer palate-cleansing breaks between bites of rich, crispy oysters.
Consider temperature contrasts when planning sides. Warm dishes like mac and cheese provide comfort, yet cool sides such as marinated tomato salad offer refreshing relief from the hot, fried elements.
This interplay of temperatures keeps each bite interesting throughout the meal.
Read also: Air Fryer Oysters Recipe
Health Benefits of Eating Oysters
Beyond their delicious taste, oysters pack a powerful nutritional punch that makes them a smart addition to your diet. Raw oysters offer the most health benefits, primarily because frying can reduce some nutritional value.
Yet, even when following a fried oysters recipe, you still gain significant nutritional advantages.
Oysters stand out as protein powerhouses, delivering about 16 grams of high-quality protein per 6-ounce serving.
This protein content supports muscle maintenance and growth, making them an excellent choice for anyone focused on fitness goals. Indeed, the protein in oysters contains all essential amino acids your body needs.
The mineral content in oysters proves exceptional, specifically:
- Zinc – supports immune function and wound healing
- Iron – essential for oxygen transport and energy production
- Selenium – acts as an antioxidant protecting cells
- Copper – aids in forming red blood cells
- Magnesium – supports nerve and muscle function
Undoubtedly, oysters excel as brain food. Their high omega-3 fatty acid content supports cognitive function and may help reduce inflammation throughout your body. Generally, these healthy fats remain present even after frying, though levels might decrease slightly compared to raw consumption.
The vitamin profile of oysters deserves special attention. A single serving provides more than your daily requirement of vitamin B12, crucial for nerve function and DNA synthesis.
Additionally, oysters contain vitamin D, which supports bone health and immune system function.
Oysters contribute to heart health through their combination of omega-3 fatty acids and potassium. These nutrients work together to help maintain healthy blood pressure levels and support cardiovascular function.
Even when prepared as deep fried oysters, these heart-healthy components remain partially intact.
For those watching their weight, oysters offer a favorable protein-to-calorie ratio. A typical serving of six medium oysters contains approximately 43 calories before frying. Obviously, the breading and oil in your fried oysters recipe will increase the calorie content, yet the meal remains relatively light compared to other fried foods.
Antioxidant compounds found in oysters help combat oxidative stress in your body. These compounds, including selenium and vitamin E, protect your cells from damage caused by free radicals.
Furthermore, oysters contain compounds that support collagen production, potentially benefiting skin health.
Male reproductive health gets a boost from oysters’ high zinc content. This mineral plays a crucial role in testosterone production and sperm health. Simultaneously, women benefit from oysters’ iron content, particularly important during menstruation or pregnancy.
The versatility of oysters in your diet extends beyond their preparation methods. Their nutrient density makes them an excellent choice for various dietary patterns, from Mediterranean to low-carb approaches.
Nonetheless, remember that breading adds carbohydrates to your fried oysters recipe.
References:
– Medical News Today
– Healthline
Nutritional Information
Understanding the nutritional profile of your fried oysters helps make informed dietary choices. A standard serving of six deep fried oysters contains approximately 175-200 calories, primarily from the breading and cooking oil.
This caloric content varies based on your breading mixture and frying technique.
The macronutrient composition shifts dramatically from raw to fried preparation. A serving of deep fried oysters typically contains:
| Nutrient | Amount per Serving |
|---|---|
| Protein | 14-16g |
| Total Fat | 11-13g |
| Carbohydrates | 8-10g |
| Dietary Fiber | 0.5g |
| Sodium | 350-400mg |
As a matter of fact, the cooking method substantially impacts the final nutritional values. Your fried oysters recipe adds approximately 80-100 calories compared to raw preparation, given these points about the breading and oil absorption.
The protein content remains relatively stable through cooking, maintaining the oysters’ status as an excellent protein source.
The breading process introduces additional carbohydrates and fats not present in raw oysters. Under those circumstances, portion control becomes crucial for maintaining balanced nutrition. A typical serving size ranges from 4-6 medium oysters, offering sufficient protein while keeping calories manageable.
To clarify the fat content breakdown, roughly 60% comes from the cooking oil, with the remainder from the oysters’ natural fats. The type of oil used affects both the total fat content and the ratio of saturated to unsaturated fats.
Choosing heart-healthy oils like grapeseed or canola helps maintain better nutritional balance.
Sodium levels warrant attention, as both the natural brine and added seasonings contribute to the total content.
One serving typically provides 15-20% of your daily recommended sodium intake. Adjusting seasoning in your breading mixture helps control sodium levels without sacrificing flavor.
The cooking process minimally affects mineral content, preserving most of the natural zinc, iron, and selenium. Yet, water-soluble vitamins may decrease slightly during frying.
The high cooking temperature can reduce vitamin B12 content by approximately 20-25% compared to raw oysters.
Cholesterol content remains moderate at 50-60mg per serving, fitting within daily recommended limits for most healthy adults. The fiber content, though minimal, comes entirely from the breading ingredients, as oysters naturally contain no dietary fiber.
For those tracking macros, fried oysters provide a protein-to-fat ratio of roughly 1.2:1, making them a moderate-protein food choice.
The carbohydrate content varies based on breading thickness but typically stays under 10g per serving, suitable for most balanced diets.
Consider the caloric density when incorporating fried oysters into your meal plan. Each piece contains approximately 30-35 calories, with the majority coming from the coating rather than the oyster itself. This makes portion control manageable while still enjoying this classic dish.
The glycemic impact remains relatively low despite the breading, thanks to the protein and fat content slowing digestion. This combination helps maintain stable blood sugar levels, especially when paired with fiber-rich side dishes.
Micronutrient retention varies during frying. While fat-soluble vitamins largely survive the cooking process, some water-soluble nutrients may decrease. However, the mineral content remains stable, preserving the oysters’ role as a nutrient-dense food choice.
References:
– Healthline
– Eat This Much
Conclusion
Mastering fried oysters requires attention to detail, though the results certainly justify the effort. While many home cooks struggle with soggy or unevenly cooked oysters, following these proven techniques ensures restaurant-quality results every time.
Temperature control stands as your most powerful ally – maintaining oil between 325°F and 350°F creates that perfect golden-brown exterior while preserving the tender, juicy meat inside.
Proper oil selection paired with careful batch management transforms ordinary oysters into crispy delicacies. Though frying adds calories, oysters remain a nutrient-dense food choice, packed with protein, minerals, and heart-healthy omega-3 fatty acids.
Their versatility shines through various serving options, whether paired with traditional coleslaw or elevated by creative side dishes.
Remember that practice leads to consistency.
Each batch teaches valuable lessons about timing, temperature, and technique. Soon enough, you’ll develop an instinct for achieving that ideal balance between crispy coating and succulent oyster meat, making this classic dish a regular star at your dinner table.