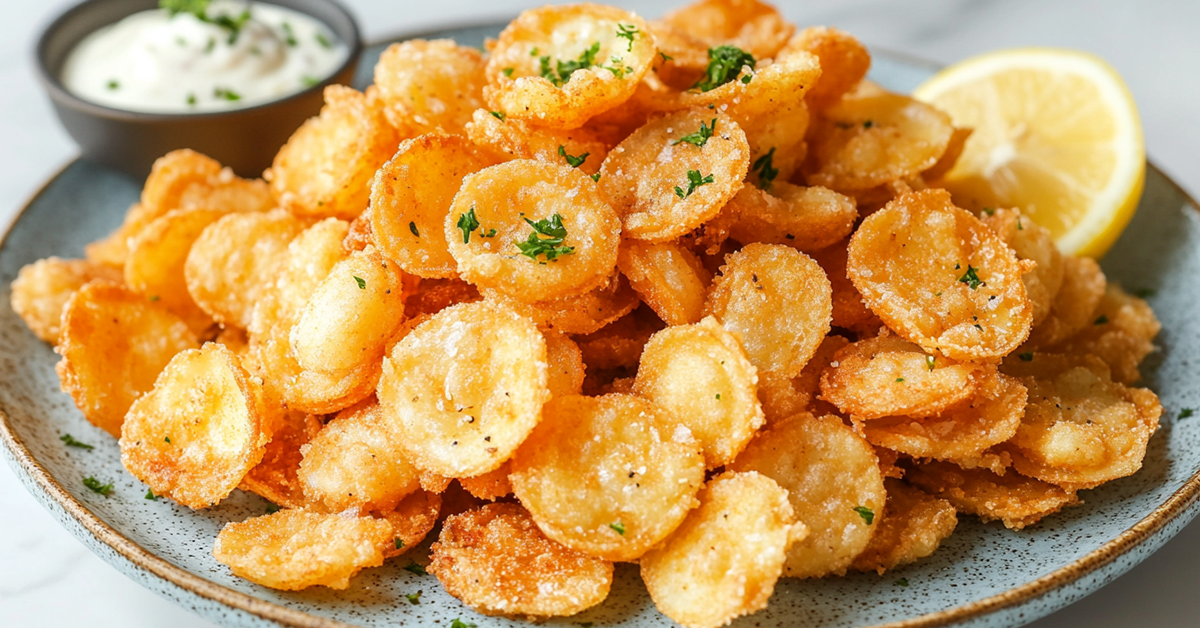
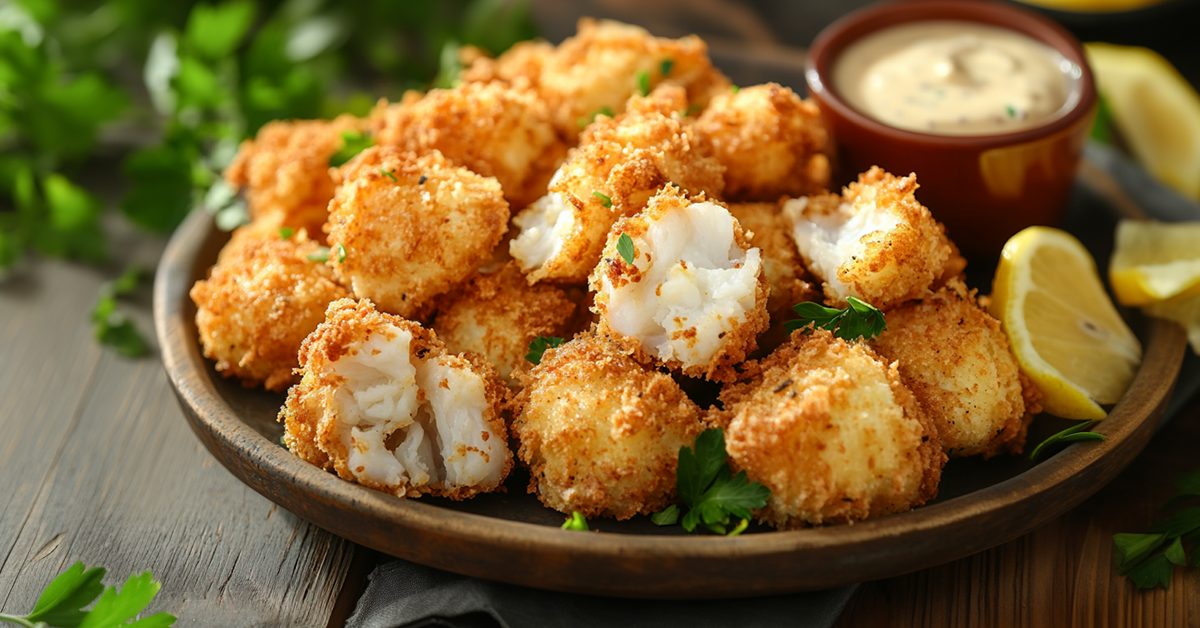
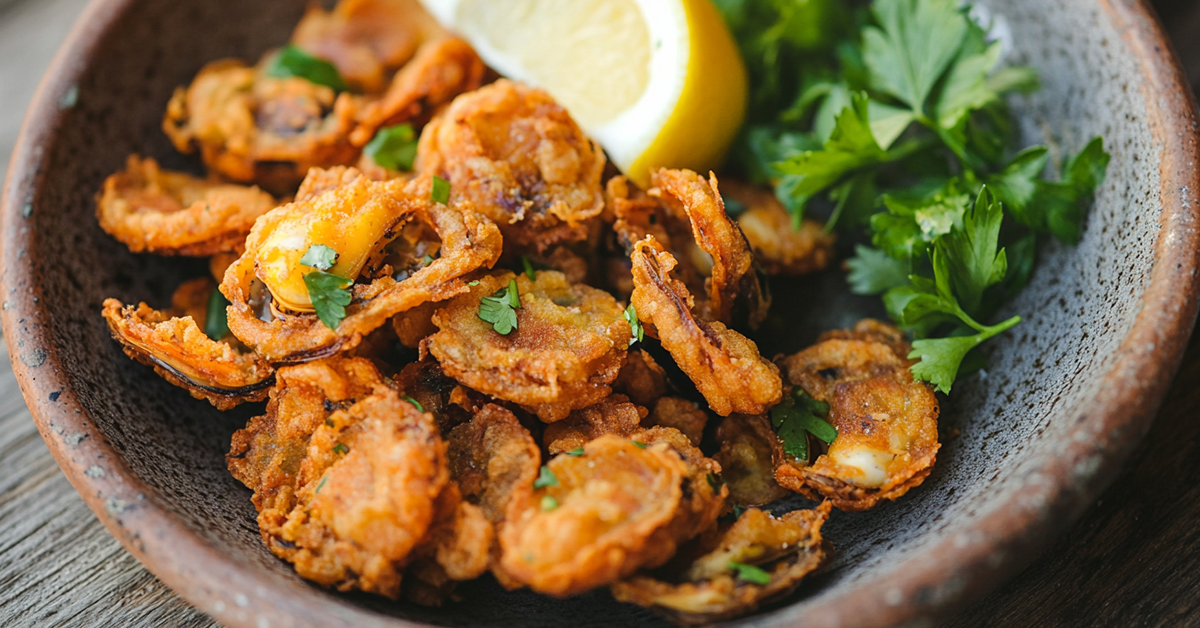
A perfect fried clam offers a golden-brown crunch on the outside and tender, succulent meat inside. This beloved seafood dish has won food lovers’ hearts for generations and remains a cornerstone of coastal cuisine.
Whole belly clams or deep fried clam strips make excellent choices for home cooking. Learning to fry clams at home will raise your seafood cooking skills. Simple ingredients combined with precise techniques create that irresistible crunch in the best fried clams.
This detailed guide shows you how to make restaurant-quality fried clams in your kitchen. You will find the secrets of this classic seafood dish, from selecting fresh clams to creating the perfect crispy coating.
Table of Contents
The Science Behind Perfect Fried Clams
A perfect fried clam needs both science and technique to get right. The right temperature and timing are the foundations of this culinary masterpiece. Your oil needs to heat up to exactly 375°F – this temperature creates pure magic.
The fat temperature makes all the difference. Clams become soggy and overcooked without that golden exterior if the oil isn’t hot enough. Deep-fat frying sets off amazing chemical changes that affect these moisture-rich clams’ lipid profile.
Science meets tradition in the coating step. Evaporated milk works best as your first layer because it helps the breading stick just right. A corn flour coating (different from cornmeal) adds a subtle sweetness that pairs beautifully with the clams’ natural brine.
Your basic frying steps:
- Dip clams in evaporated milk
- Coat with corn flour mixture
- Fry for 90 seconds to 2 minutes
- Let oil reach proper temperature between batches
Clean oil makes perfect fried clams. You need to filter it daily and keep it fresh. Some places use two vats – one removes extra breading while the other creates that final crisp.
The clams and oil create complex chemical reactions during frying. Studies show that deep-fat frying increases triacylglycerol content and decreases other compounds over time. These changes shape both texture and flavor.
Extra-crispy clams need a double-dip approach: dip your breaded clams in buttermilk again and add more breading. This comes down to personal taste – too much coating can overpower the clam’s delicate flavor.
Small batches of 8-10 clams work best. Large batches cool down the oil too much and leave you with greasy, poorly cooked clams. The oil needs time to bounce back between batches.
Read also: Smoked Clams Recipe
Types of Clams Used for Frying
The right clam variety can transform your fried clams from good to exceptional. Each type brings its own unique textures and flavors to the table.
Soft-shell clams, which people call “steamers,” stand out as the classic choice to make whole belly fried clams. These tender mollusks deliver a sweet, briny flavor that works beautifully with the crispy coating. The delicate meat and soft shells make quick frying a breeze.
Here are the most popular clam varieties to fry:
- Ipswich clams – prized to their tender, full-bellied texture
- Cherry stones – smaller, sweeter, and perfect to strip-style frying
- Quahogs – larger clams that work best chopped into strips
- Manila clams – small, sweet, and great with light breading
Your preference determines the choice between whole belly clams and strips. Whole belly fried clams give you the complete clam with its digestive tract intact, delivering a fuller, more authentic flavor. Strip clams might serve as a better starting point if you’re new to fried clams since they offer a milder taste and consistent texture.
The best whole belly clams should look plump and carry that fresh ocean smell. You’ll want shells that stay tightly closed or snap shut with a gentle tap. Stay away from clams that have broken shells or remain open after touching.
Strips usually come from larger, tougher clams like quahogs. These pieces handle the frying process better and appeal to people who enjoy clam flavor without the full belly experience.
Fresh vs. Frozen: Quality frozen clams work well even though fresh ones are ideal. Frozen clams need a complete thaw and pat-dry before breading. Moisture ruins the crispy texture you’re trying to achieve.
Strip-style clams make an excellent starting point. They cook evenly and maintain consistent size. You can explore whole belly clams as your confidence grows to get that authentic New England experience.
You may like: Greek Fried Fish Recipe
Note that smaller clams create better crispiness and fry more evenly. A size of 2-3 inches works best to get great results with whole belly clams.
The Rich History of Fried Clams
A simple joke at a roadside stand reshaped the scene of New England’s culinary world forever. Fried clams appeared on menus as early as 1865 at Boston’s Parker House hotel. The modern version of this beloved dish has quite a colorful story behind it.
New England origins
We owe this favorite seafood treat to Lawrence “Chubby” Woodman and his wife Bessie in Essex, Massachusetts. Their small roadside stand struggled to attract customers until July 3, 1916. A local fisherman named Tarr made a casual suggestion that would make history. “Why don’t you fry your clams?” he joked, adding that if they turned out as good as Woodman’s potato chips, customers would never be a problem again.
The Woodmans spent that evening trying different batters in their potato chip fryer until they found just the right mix. Their creation made its debut during Essex’s Fourth of July parade the next day. They earned $35 – more money than they’d ever made in a single day.
Evolution through decades
Fried clams caught on faster across New England. Boston fish markets advertised this “new taste treat” just one year after the Woodmans’ invention. The dish developed this way:
- Early versions (1840s-1850s) featured clams sautéed in butter or made into fritters
- The Woodmans introduced their deep-fried, breaded version in 1916
- Thomas Soffron later created clam strips, which helped popularize fried clams nationwide through Howard Johnson’s restaurants
Cultural significance
Fried clam shacks now dot the entire New England coastline. Each claims to serve the region’s best. The dish means more than just food – it stands as a symbol of coastal New England’s identity.
Woodman’s original recipe stays the same: fresh clams, evaporated milk, corn flour, and lard. This steadfast dedication to tradition keeps the authentic taste that made fried clams famous. Boston’s North Shore became America’s “fried clam belt.” The combination of pristine waters and smooth sand produces some of the sweetest, most tender clams in the world.
Fried clams played a crucial role in shaping New England’s seafood industry. The dish created new opportunities for clam diggers and launched countless seafood establishments. This changed how Americans enjoy seafood fundamentally.
Read also: Fried Whiting Recipe
How to Fry Clams to Crispy Perfection
You can create perfectly crispy fried clams with the right technique and attention to detail. Let’s take a closer look at the steps that will help you become skilled at making this classic seafood dish at home.
Your workspace needs proper setup. Create three stations: one for flour mixture, one for wet ingredients, and one for cleaned clams. This organization will give a smooth cooking flow with consistent results.
Temperature control is the secret to success. Your oil should reach exactly 375°F – use a good thermometer. The coating burns before clams cook if it’s too hot, and you’ll get greasy, soggy clams if it’s too cool.
Here are the steps to fry your clams:
- Clean and dry your clams really well
- Dip in evaporated milk or buttermilk
- Coat with seasoned corn flour mixture
- Shake off excess coating
- Carefully lower into hot oil
- Fry for 1-2 minutes until golden brown
- Remove and drain on paper towels
- Season immediately with salt
These pro tips will help you get crispy results:
- Work in small batches – don’t overcrowd your fryer
- Let oil reach proper temperature between batches
- Keep fried clams warm in a 200°F oven while cooking remaining batches
- Pat clams completely dry before coating
Your coating technique makes a big difference. Hold each clam by its “neck” during dipping and let excess liquid drip off before the flour mixture. This prevents clumping and creates an even coating.
Look for visual cues while frying. A perfect fried clam should be light golden brown with a crispy exterior that crackles when touched. Your oil is probably too hot if clams brown too quickly.
Common mistakes to avoid: One flip is enough – don’t handle the clams too much. The coating can fall off with excessive handling. Paper grocery bags can make your crispy clams soggy, so avoid draining on them.
The double-dipping method gives extra crunch. After the first coating, quickly dip again in milk and flour. This creates a thicker crust, though some purists like the lighter, traditional single coating.
Read also: Anjal Fish Recipe
Note that practice leads to perfection. Your first batch might not look restaurant-quality, but each try brings you closer to perfect fried clams. Keep your oil clean, temperature steady, and technique consistent.
Fried Clams Recipe
- Total Time: 50 minutes
- Yield: 4 servings 1x
Description
Want to make amazing restaurant-style fried clams at home? This proven recipe gives you that perfect crispy coating with tender, juicy clams inside.
The natural sweetness of fresh clams shines through a light, crispy coating in this classic New England-style recipe. Your weekend seafood feasts and special occasions deserve these delectable fried clams.
Ingredients
- 2 pounds fresh whole belly clams, cleaned.
- 2 cups evaporated milk.
- 2 cups corn flour.
- 1 cup all-purpose flour.
- 1 tablespoon Old Bay seasoning.
- 1 teaspoon salt.
- 1/2 teaspoon black pepper.
- Vegetable oil for frying.
- Lemon wedges for serving.
Instructions
- Prepare the clams: Clean your clams with a good rinse and pat them dry with paper towels.
- Set up stations: Place evaporated milk in one bowl. Mix corn flour, all-purpose flour, Old Bay seasoning, salt, and pepper in another bowl.
- Heat oil: Add 3 inches of oil to a heavy-bottomed pot. Let it heat to 375°F with a thermometer.
- Coat clams: Each clam needs a dip in evaporated milk followed by a coating in the flour mixture. Give them a gentle shake to remove excess.
- First batch: Add 8-10 clams to the hot oil carefully. Let them fry until golden brown, about 1-2 minutes.
- Drain: Take them out with a slotted spoon, place on paper towels, and add a pinch of salt right away.
- Continue frying: Work through the remaining clams. The oil should reach proper temperature between batches.
Notes
– A warm 200°F oven keeps your fried clams crispy while finishing the rest.
– Double-dipping in milk and flour mixture creates extra crunch.
– Fresh oil makes the best-tasting clams.
– These clams taste best right away with tartar sauce and lemon wedges.
– Strain and store your leftover oil properly.
- Prep Time: 20 minutes
- Cook Time: 30 minutes
- Category: Seafood
- Method: Frying
Health Benefits of Fried Clams
Fried clams might not be your first choice for healthy eating, but they pack quite a nutritional punch. You can make smarter choices about how to prepare this seafood favorite and still enjoy its benefits.
These tasty morsels hide a wealth of essential nutrients behind their crispy coating. Your plate of fried clams gives you:
- High-quality protein for muscle maintenance
- Rich source of vitamin B12 for nerve function
- Abundant zinc for immune system support
- Iron for healthy blood cells
- Omega-3 fatty acids for heart health
- Selenium for antioxidant protection
Smart preparation matters. You can boost your fried clams’ nutritional value at home by using heart-healthy oils like canola or peanut oil. These oils handle high temperatures well and offer better fatty acid profiles than other options.
Frying doesn’t change the clams’ protein content. A typical serving gives you 20-25 grams of protein that helps maintain and repair muscles.
Your breading choice can make these treats even healthier. Whole grain flour or ground nuts in your breading mix add fiber and healthy fats while keeping that satisfying crunch.
Portion control is key. These nutrient-rich treats work best as an occasional indulgence. A smaller portion paired with plenty of fresh vegetables or salad creates a balanced meal.
Craving that classic fried clam taste while watching calories? Try these healthier cooking methods:
- Air frying with a light coating
- Pan-searing with minimal oil
- Baking with a crispy breadcrumb topping
The clams’ benefits go beyond protein and minerals. Zinc boosts your immune system, and B-vitamins keep your energy levels steady throughout the day. These nutrients stay mostly intact even after frying.
Clams’ omega-3 fatty acids help your brain health and reduce inflammation, though frying might affect some of these benefits. You can keep more of these good compounds by limiting your frying time.
Smart cooking techniques and moderation let you enjoy fried clams as part of healthy eating. This seafood delicacy can fit into a balanced diet when you make informed choices about preparation methods.
References:
– Eat This Much
– Nutritionix
Nutrition Information for Fried Clams
The nutritional content of your favorite seafood dish can help you make smarter choices about what you eat. Let’s look at what you get in each serving of those crispy, golden fried clams.
A typical restaurant portion of fried clams (about 6-7 ounces) gives you these nutrients:
| Nutrient | Amount per Serving |
|---|---|
| Calories | 450-500 |
| Protein | 20-25g |
| Total Fat | 28-32g |
| Carbohydrates | 35-40g |
| Sodium | 800-1000mg |
| Cholesterol | 85-95mg |
The way you prepare your clams affects these values by a lot. Home-fried clams pack fewer calories and less fat than restaurant versions, especially if you watch the oil temperature and coating thickness.
These key factors change the nutritional profile:
- Coating thickness and type
- Oil temperature during frying
- Serving size
- Clam variety used
- Draining method after frying
Whole belly clams and strips show small differences in their nutrients. Whole belly fried clams give you more omega-3 fatty acids and minerals. Strips usually have more coating compared to clam meat.
Your portion size makes all the difference in how the meal affects you. A smaller appetizer portion (3-4 ounces) has about half the calories and fat of a full serving. This lets you enjoy this seafood treat while watching what you eat.
The fat content breakdown needs a closer look. Your choice of frying oil adds up to the total fat content. Traditional vegetable oil gives you mostly polyunsaturated and monounsaturated fats. Saturated fats make up about 25-30% of the total fat.
Salt levels can be tricky if you watch your sodium intake. The breading and seasoning bump up the sodium levels. You can cut back on this at home by tweaking your seasoning mix and using less salt in your coating.
Fried clams offer a good protein-to-fat ratio if you track your macros. The coating might add more carbs than you’d expect. The protein quality stays excellent, giving your body all the essential amino acids it needs.
Remember that extras like tartar sauce, cocktail sauce, or lemon juice change these numbers. Just one tablespoon of tartar sauce adds about 75-80 calories and 8g of fat to your plate.
The mineral content stays pretty much the same even after frying. You’ll still get plenty of iron, zinc, and selenium, though some water-soluble vitamins might drop during cooking.
References:
– Eat This Much
Pairing Fried Clams with Side Dishes
A perfect plate of fried clams needs the right companions. Your choice of side dishes can turn a good seafood meal into an unforgettable dining experience.
Classic Comfort Sides are still the most popular choices with fried clams. A well-made potato salad offers a creamy contrast to the crispy coating, and traditional coleslaw adds a fresh, crunchy element that cuts through the richness. You’ll want these timeless favorites for the ultimate New England experience:
| Side Dish | Flavor Profile |
|---|---|
| Hush Puppies | Golden-brown cornmeal bites |
| Crispy Onion Rings | Light, crunchy texture |
| Buttery Dinner Rolls | Soft, warm complement |
| Sautéed Zucchini | Fresh, light contrast |
Your sauce selection is a vital part of the overall experience. Here are some great accompaniments:
- Classic Tartar Sauce – The traditional choice
- Cocktail Sauce – For a zesty kick
- Lemon Aioli – A citrusy modern twist
- Remoulade Sauce – Adds tangy, complex flavors
To name just one example, see how fresh elements can brighten your plate. Sautéed corn brings sweet, seasonal flavors that pair beautifully with briny clams. A vibrant beetroot salad adds both color and refreshing contrast to your fried seafood feast.
A crisp lager beer makes a light, refreshing companion to fried clams. You might want to try a glass of white wine or maybe even champagne to make your meal extra special.
Your seafood feast gets even better with a mixed platter. Fried clams taste amazing alongside other seafood favorites like scallops and oysters. This gives your guests plenty of variety while keeping that coastal vibe.
Innovative Sides bring unexpected delights to your plate. A corn chowder works as an aromatic and comforting companion – its creamy broth balances the clams’ crispy texture. Zucchini pasta (zoodles) tossed with garlic and parmesan offers a lighter option that satisfies.
Temperature contrasts make each bite more interesting. Hot fried clams paired with cold sides like potato salad or coleslaw create an exciting mix of temperatures that boost the overall experience.
Simple combinations work best sometimes. A wedge of lemon and crispy french fries might be all your perfectly fried clams need. This classic pairing has stood the test of time and with good reason too – it lets the clams’ natural flavors shine while creating perfect texture contrasts.
Serving Fried Clams: Presentation and Plating Ideas
A beautiful presentation will turn your perfectly cooked fried clams from a simple dish into an Instagram-worthy masterpiece. The right plating techniques will improve both the visual appeal and taste experience of your seafood creation.
Your serving vessel sets the foundation. Paper boats have a casual charm, but here are some elevated options to try:
- White ceramic plates for elegant contrast
- Rustic wooden boards for coastal charm
- Metal mesh baskets for modern industrial style
- Seashell-shaped dishes for themed presentation
The rule of thirds should guide your plating strategy. Place your golden fried clams slightly off-center to create visual interest and leave room for accompaniments. This design principle naturally draws the eye across the plate.
These plating elements are vital:
| Element | Purpose | Example |
|---|---|---|
| Height | Creates dimension | Stack clams pyramidally |
| Color | Adds visual interest | Bright lemon, herbs |
| Texture | Provides contrast | Microgreens, sauce drizzles |
| Space | Allows dish to “breathe” | Clean plate edges |
Temperature management is a vital part of your presentation. Serve fried clams right away on pre-warmed plates to keep that perfect crispiness. You can keep finished clams warm in a 200°F oven while you complete your artistic arrangement for multiple servings.
Color coordination makes your plate stand out. Golden-brown fried clams look stunning with:
- Vibrant greens from fresh herbs
- Bright yellows from lemon wedges
- Rich reds from cocktail sauce
- Creamy whites from tartar sauce
Strategic sauce positioning creates visual flow. Skip the separate ramekins and try artistic swooshes or dots on your plate. This modern approach looks sophisticated and lets diners get the perfect amount of sauce in each bite.
A seafood tower works great for family-style service. Different serving platforms create layers, with your fried clams at the top. This dramatic style shines at special occasions or when you’re serving various seafood dishes.
Good garnishing can make simple fried clams look restaurant-quality. Fresh herbs like dill, parsley, or micro-cilantro add color and freshness. A light dusting of paprika or Old Bay seasoning around the plate’s rim gives it a professional touch.
Textural contrasts make your presentation pop. Crispy fried clams look amazing against smooth sauce patterns. You can create parallel lines with different sauces or use a spoon’s back to make elegant curves on your plate.
Casual gatherings call for traditional newspaper-style presentation with a modern twist. Food-grade wax paper with newspaper prints lines your serving vessel – it’s nostalgic yet food-safe. Beach parties and outdoor events are perfect for this style.
Empty space on the plate works in your favor. A clean, minimalist presentation lets your perfectly fried clams be the star. Clean edges and wiped-away oil spots or sauce drips make the final presentation shine.
Mini cast-iron skillets make great individual portions for special occasions. They create a rustic-chic look and keep food warm. A fresh herb sprig and lemon wedge on the skillet’s edge add an elegant finishing touch.
Timing puts the final touch on your presentation. Have garnishes and sauces ready before your clams finish frying. Quick plating keeps the clams crispy and creates a dish that’s both beautiful and delicious.
You may like also: Fried Red Snapper Recipe
Conclusion
The perfect fried clam brings together art, science, and tradition. Your success depends on careful attention to temperature control, proper coating technique, and quality ingredients. The process might just need some practice at first, but perfectly crispy, golden-brown clams make every step worthwhile.
Quality fried clams start with fresh ingredients and end with thoughtful presentation. You can choose whole belly clams for authentic flavor or strips that cook consistently. The right oil temperature and avoiding common mistakes will give you restaurant-quality results. Your creation pairs well with classic sides like coleslaw, and you can try modern accompaniments to add a fresh twist to this beloved seafood dish.
The trip from raw clams to crispy perfection takes practice, and each batch improves your skill. These techniques, tips, and historical insights will help you create perfectly fried clams that would make even the Woodmans proud.

